India to .... in 6-7 seconds
Why I Built LiveTran
Live-streaming is one of the things that felt very simple on the surface but was really complicated once I started building it. I've built Ed-Tech platforms and Creator tools that actively used live-streaming and VOD streaming. OBS sends the video, the server ingests it, transcodes it, packages it, and publishes it to a CDN. I've always relied on tools like Mux or Livekit.
I then thought, Why not build it myself?
Here's a complete story and description of technical internals of this project.
What I Wanted
Many projects that I built had some form of live streaming or VOD playback:
live classes, music lessons, interactive teaching, and so on. I wanted something that:
- Supports SRT Streams from OBS.
- Automatically convert the stream to HLS.
- Handle publishing to CDN.
- Sends events to front-end.
- Simple SDK instead of complicating stuff.
- Self-Hostability ( My main goal )
The Architecture
Ingest Service: Real-Time Pipeline Entry
I wrote the ingest service in Go because of its concurrency strengths and ability to handle network-heavy workloads.
Protocol Support ( SRT )
- Good library support (with github.com/datarhei/gosrt)
- Handles bad networks well
- Low latency with UDP
- Secure by default: Built-in AES encryption
When Stream Starts
- Go server validates the stream-key.
- Go server allocates an internal SRT port.
- Go server starts a Go Routine which handles storage of packets.
- Notifies the User with events.
Dynammic Port Allocation
func GetFreePort(min, max int) (int, error) {
    for port := min; port <= max; port++ {
        addr := fmt.Sprintf(":%d", port)
        l, err := net.Listen("udp", addr)
        if err == nil {
            l.Close()
            return port, nil
        }
    }
    return 0, errors.New("no ports available")
}
This means each customer gets an isolated ingest → transcode path.
Transcoder Service: Where The Magic Happens
Once the ingest server hands off the stream, the real work begins. The transcoder takes the raw SRT input processes it frame-by-frame, and packages it into a stable HLS output. This is where FFmpeg becomes the core engine of LiveTran.
FFmpeg Command Internals
My FFmpeg command was roughly:
ffmpeg \
    -f mpegts \
    -i pipe:0 \
    \
    -c:v libx264 \
    -preset veryfast \
    -tune zerolatency \
    -crf 23 \
    -g 60 \
    -keyint_min 60 \
    \
    -c:a aac \
    -b:a 128k \
    \
    -f hls \
    -hls_time 4 \
    -hls_list_size 10 \
    -hls_flags delete_segments+independent_segments+append_list \
    -hls_segment_type mpegts \
    -hls_allow_cache 1 \
    \
    -hls_segment_filename output/%s_%%03d.ts \
    output/%s.m3u8
Key Technical Decisions
veryfast preset
I initially tested ultrafast, but it pushed CPU usage too high and caused unstable quality during peak load.
veryfast offered:
- smoother CPU usage
- more consistent frame pacing
- fewer dropped frames during bitrate spikes It was the best compromise between speed and compression.
Zerolatency tuning
The -tune zerolatency flag helped reduce internal FFmpeg buffering.
This kept the pipeline responsive and prevented the transcoder from building up large queues, which can silently increase latency during busy periods.
4-second segments
I chose 4 seconds because:
- it reduced segment churn on the storage bucket
- it allowed smoother bitrate control
- it avoided playlist flapping during rapid scene changes
- it made uploads to R2 more predictable It’s slightly higher latency, but way more stable for production.
MPEG-TS over MP4
I stuck with mpegts for segments because:
- it’s resilient to partial writes
- players can decode it mid-download.
- MP4 requires finalization, making it less suitable for live ingest
TS was simply more forgiving and stable.
Segment Upload Pipeline
Every .ts segment is uploaded instantly after FFmpeg writes it. I used a Go routine to manage this:
watcher, _ := fsnotify.NewWatcher()
watcher.Add(outputDir)
However, I faced an Issue with how this setup treated .m3u8 files. The thing is, FFMpeg overwrites the .m3u8 manifest files because of how HLS is designed. So i had to use a time.sleep with this condition
if strings.HasSuffix(path, ".m3u8") && (event.Op&fsnotify.Create == fsnotify.Create || event.Op&fsnotify.Write == fsnotify.Write) PS: If you are interested on how i solved this. Visit LiveTran r2-helper.go Source
The SDK: Developer-Friendly Control Plane
The SDK hides the entire complexity behind simple functions. Example:
const stream = await client.startStream({
  title: "My Stream",
  description: "Testing"
})
Behind this API call:
- API creates stream entry
- Ingest is primed
- Transcoder is signaled
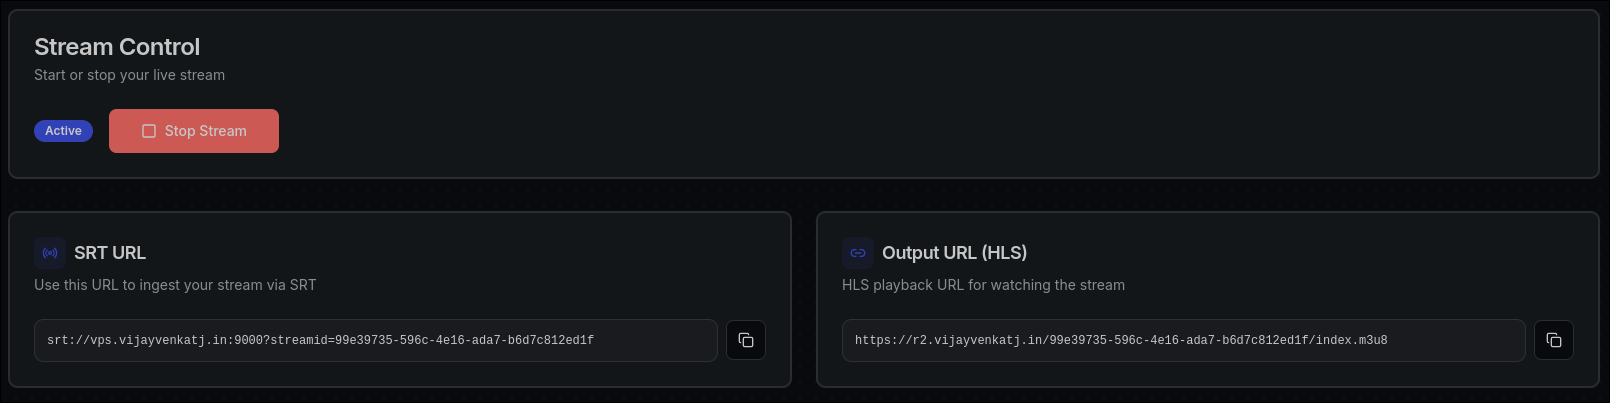
- A unique srt_url + output_url is returned
Developers never touch FFmpeg manually.
This SDK is available for JS and TS: LiveTran SDK for JavaScript
NOTE: Never Use the SDK on Client Side.
API Server: The Brain of LiveTran
So far so good. I managed to make a go server which can handle the core working of the pipeline. Now what?.. I wanted to make this easy to use my making a site which can handle the API Credits handling and other business logic. So I started making my livetran webapp with NextJS 15. This webapp was just the cover of the main Webserver which handles the buisness logic.
My WebServer handles:
- Authentication
- Project and API Key management
- Credits management ( More on that later... )
Authentication
- For the Authentication part, I used Auth.JS ( Now accuired by BetterAuth )
- It handles the session management and User authorisation in the webapp
Note: If you are interested in using Auth.js. Visit their docs at Auth JS Documentations
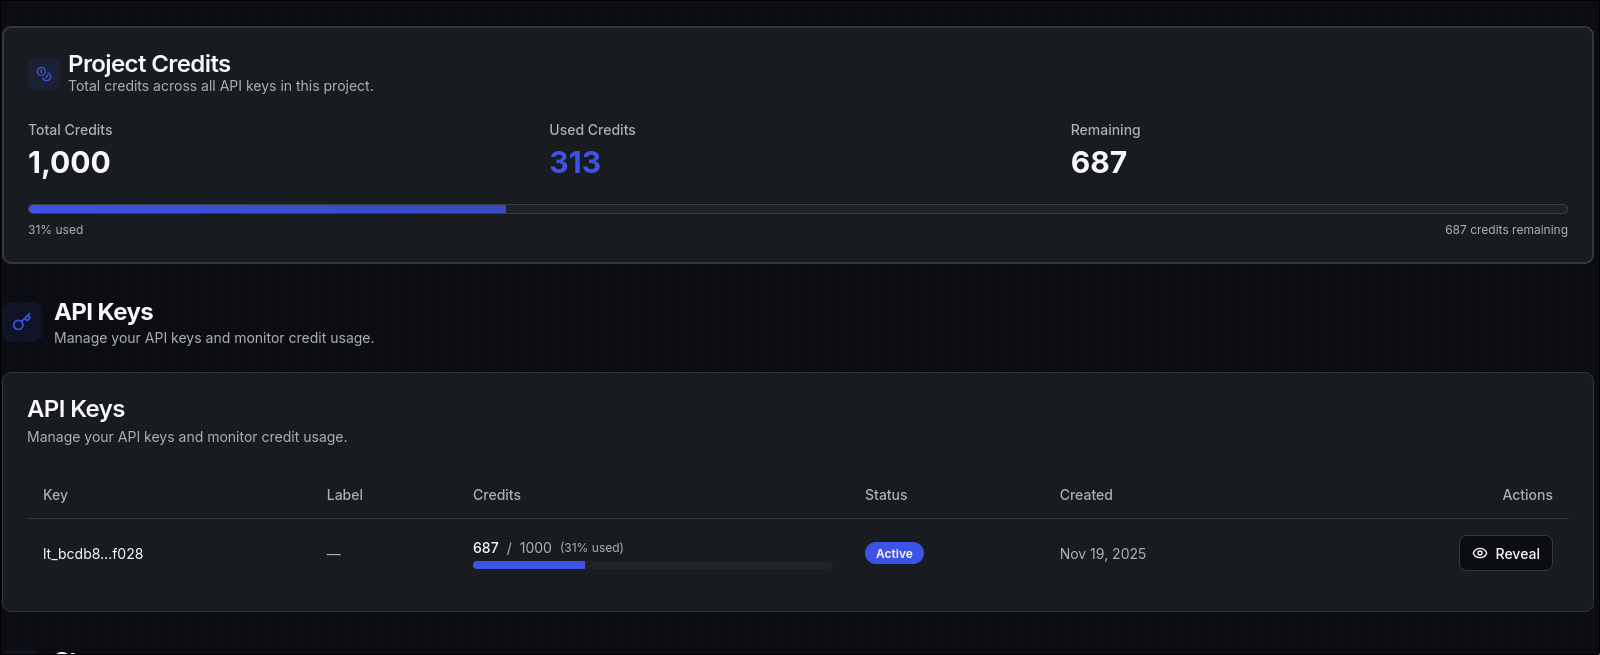
Credit Management
This was very interesting to work on. My goal was to develop a time based credit system. Issues was... This could not be hosted on a Serverless environment. Since it needed active timers to be set.
How I solved this
Since I was using Go, I had an option
ticker := time.NewTicker(15 * time.Second)
defer ticker.Stop()

ctx, cancel := context.WithTimeout(context.Background(), duration)
defer cancel()
So I basically, Had to setup a ticker which checks for the users API-credits and cancels the stream once it drops to 0.
Or the User stops the stream.
After the stream is stopped. The Credits are deducted from the user's account.
Deployment & Docker Networking
So yeah, I covered everything about the working of the application. Now all i had to do was easy DEPLOY!!!. Atleast that was what I was thinking. Unfortunately deployment was not simple as it should have been :(
I got a VPS from Hostinger ( KVM8 ). Honestly it costed me a decent amount but yeah, anything for curiosity.
Problems I faced
UDP inside Docker bridge networks is tricky.
Symptoms:
- SRT packets not reaching transcoder
- Ports showing open but no traffic
- FFmpeg freezing due to incomplete packets
Fixes included:
- forcing ipv4
- using host networking in certain environments
- binding FFmpeg explicitly to 0.0.0.0
- adjusting MTU to prevent fragmentation
Idea and Architecture
 So basically, I wanted to add a webapp with nextjs, webserver with go, postgreSQL Database.
So the communication between them should be secure.
So basically, I wanted to add a webapp with nextjs, webserver with go, postgreSQL Database.
So the communication between them should be secure.
So I made a docker network for these services to contact each other with ease
sudo docker network create backend
Explanation of Networks
-
backend network This is the private network where all your internal services talk to each other.
Ingest → Transcoder → API → Database → Redis all stay inside this secure network. -
frontend network This is the network where your Next.js webapp lives.
It exposes only the web UI to the public, while everything sensitive stays inside backend. -
Why two networks? To keep the important streaming stuff (ingest, transcoder, API, DB) hidden and protected, and only expose the web interface that users need to access.
-
How services talk Services on the same network can reach each other just by using container names.
Example:apican reachpostgresby simply callingpostgres:5432.
Configuring the firewall
Since I already abstracted all the networking logic by docker-compose. I configured firewall by only opening the ports necessary.
PS: I will write another blog explaining how I'm gonna configure my VPS for security.
Final Results
So yeah, I build the server and deployed it. Time to see if my work had any meaning.
I tested the entire flow:
- Started stream from sandbox
- Streamed from OBS
- Checked HLS latency
- Verified credit deductions
- Benchmark API throughput
- Monitored VPS resource usage
I started the stream through the sandbox from my webapp
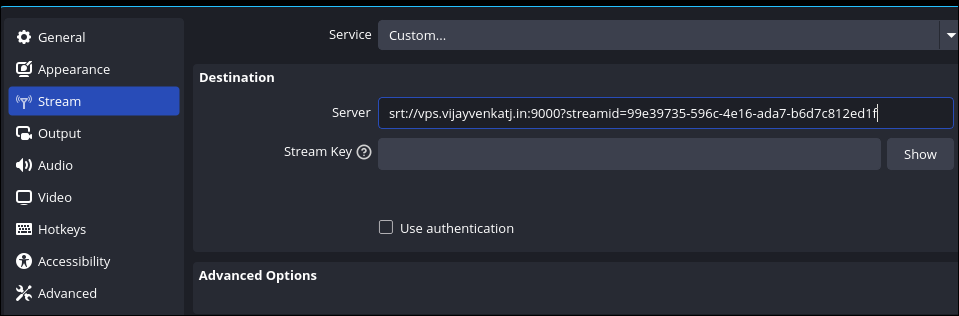
 I started streaming using OBS from my laptop
Checked the latency using Akamai's player for HLS

Finally checked if the credit management worked.
Benchmarks
API Performance
Using wrk:
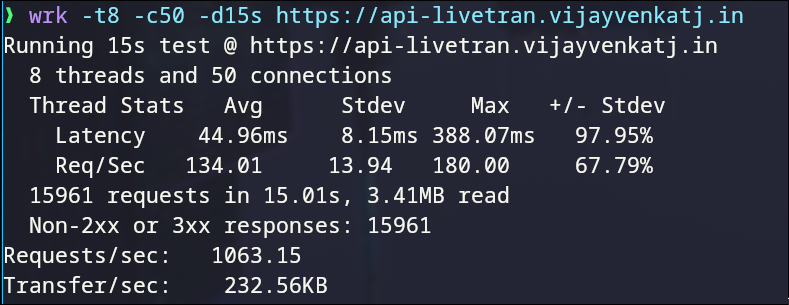 Good for a Go API with minimal tuning.
So From all this, I knew that my service was working as intended.
So I also checkout the Hostinger VPS stats.
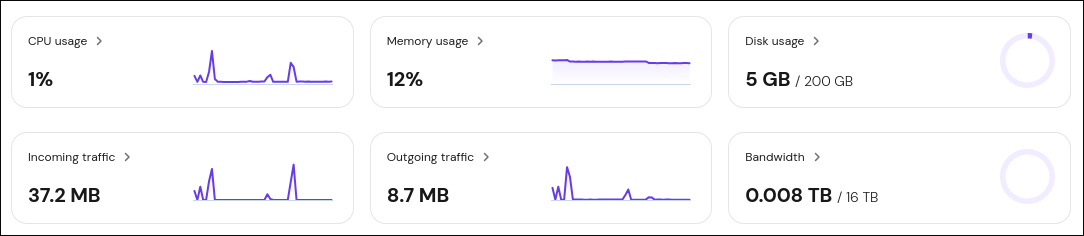
Conclusion
Building LiveTran taught me that live streaming looks simple only when you’re not the one running the pipeline. Once you dive into ingest protocols, FFmpeg stability, HLS packaging, storage latency, and network unpredictability, you begin to realize how much coordination happens behind the scenes.
There’s still a lot more for me to explore things like LL-HLS, CMAF, and even GPU-based transcoding for lower latency and higher stability.
Hope you enjoyed the read. This is my first blog, so I’d love to hear your thoughts, feedback, or anything you’d like me to write about next.
Connect With Me
If you enjoyed this write-up or want to follow my work, feel free to reach out or connect with me here:
-
GitHub: https://github.com/vijayvenkatj
-
Twitter/X: https://x.com/VIJAY_4737K
-
LinkedIn: https://linkedin.com/in/vijayvenkatj
-
Website: https://vijayvenkatj.in
-
LiveTran Project: https://livetran.vijayvenkatj.in
Always happy to connect, chat about backend systems, streaming, Go, or anything tech!